Getting Started with the CKG Build
Setting up the Clinical Knowledge Graph is straightforward.
Assuming you have Python 3.6 already installed and added to PATH, you can choose to create a virtual environment where all the packages with the specific versions will be installed. To do so, use Virtualenv.
To check which Python version is currently installed:
$ python3.6 --version
And where this Python version is:
$ which python3.6
If this does not correspond to the correct Python version you want to run, you can create a shell alias in the bash file:
Open the bash file:
$ vi ~/.bash_profile
Add at the end of the file:
alias python3.6="/path/to/correct/python3.6"
Save and close the bash file
Make the alias available in the current session:
$ source ~/.bash_profile
Note
If you don’t have Python 3.6 installed, download the Python 3.6 version appropriate for your machine, and run the installer package. Python should be installed in /Library/Frameworks/Python.framework/Versions/3.6/bin/python3.6 and also found in /usr/local/bin/python3.6.
Create a virtual environment
Virtualenv is not installed by default on Macbook machines. To install it, run:
$ python3 -m pip install virtualenv
To create a new virtual environment using a custom version of Python, follow the steps:
Take note of the full path to the Python version you would like to use inside the virtual environment.
Navigate to the directory where you would like your virtual environment to be (e.g. user’s root).
Create the virtual environment at the same time you specify the version of Python you wish to use.
env_nameis the name of the virtual environment and can be set to anything you like.
$ virtualenv -p /path/to/python env_name
Activate the virtual environment by running:
$ source path/to/env_name/bin/activate
After this, the name of the virtual environment will now appear on the left of the prompt:
(env_name) username$
Note
If you are finished working in the virtual environment for the moment, you can deactivate it by running: deactivate
Setting up the Clinical Knowledge Graph
The first step in setting up the CKG, is to obtain the complete code by clone the GitHub repository:
$ git clone https://github.com/MannLabs/CKG.git
Once this is finished, you can find all the Python modules necessary to run the Clinical Knowledge Graph in requirements.txt.
To install all the packages required, simply run:
$ cd CKG/
$ pip3 install --upgrade pip
$ pip3 install --ignore-installed -r requirements.txt
Warning
Make sure the virtual environment previously created is active before installing requirements.txt.
Now that all the packages are correctly installed, you will have to create the appropriate directory architecture within the local copy of the cloned repository:
$ python setup_CKG.py
$ python setup_config_files.py
This will automatically create the data folder and all subfolders, as well as setup the configuration for the log files where all errors and warnings related to the code will be written to.
Add CKG to .bashrc
In order run the the Clinical Knowledge Graph, add the path to the code to your .bashrc (or .bash_profile):
Open the .bashrc file.
Add the following lines to the file and save it:
PYTHONPATH="${PYTHONPATH}:/path/to/folder/CKG/src/"
export PYTHONPATH
Notice that the path should always finish with “/CKG/src/”.
To reload the bash file, first deactivate the virtual environment, reload ~/.bashrc, and activate the virtual environment again:
$ deactivate
$ source ~/.bashrc
$ source path/to/env_name/bin/activate
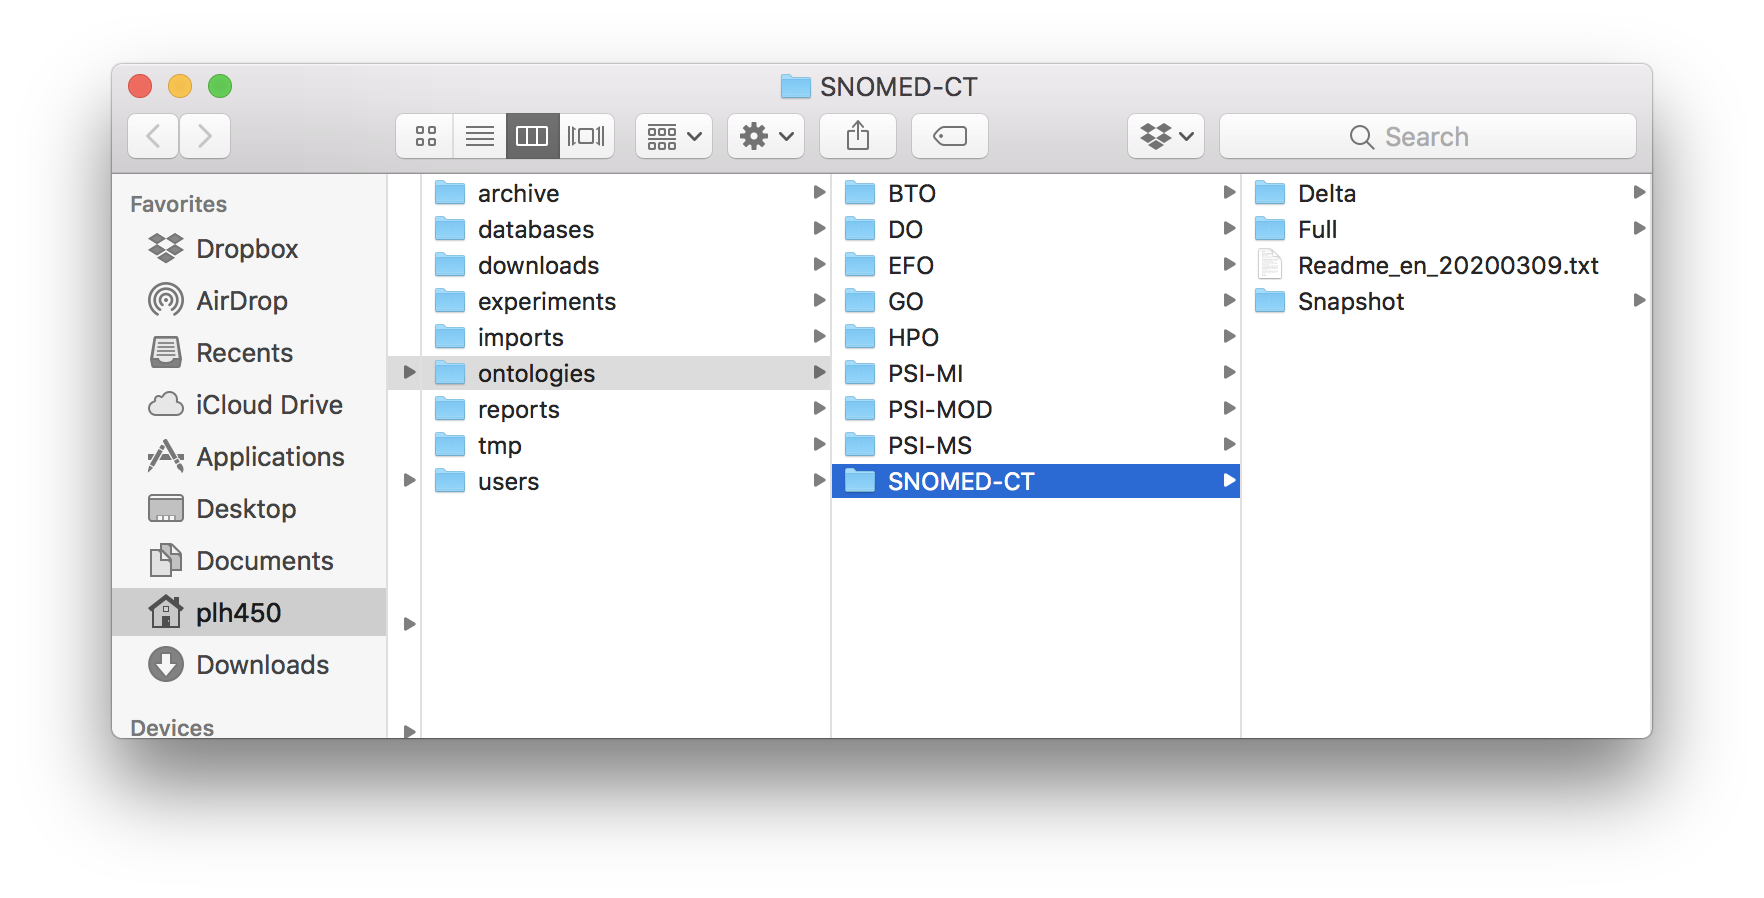
SNOMED-CT ontology folder.
Build Neo4j graph database
The building of the CKG database is thoroughly automated. Most of the biomedical databases and ontology files will automatically be downloaded during building of the database. However, the following licensed databases have to be downloaded manually.
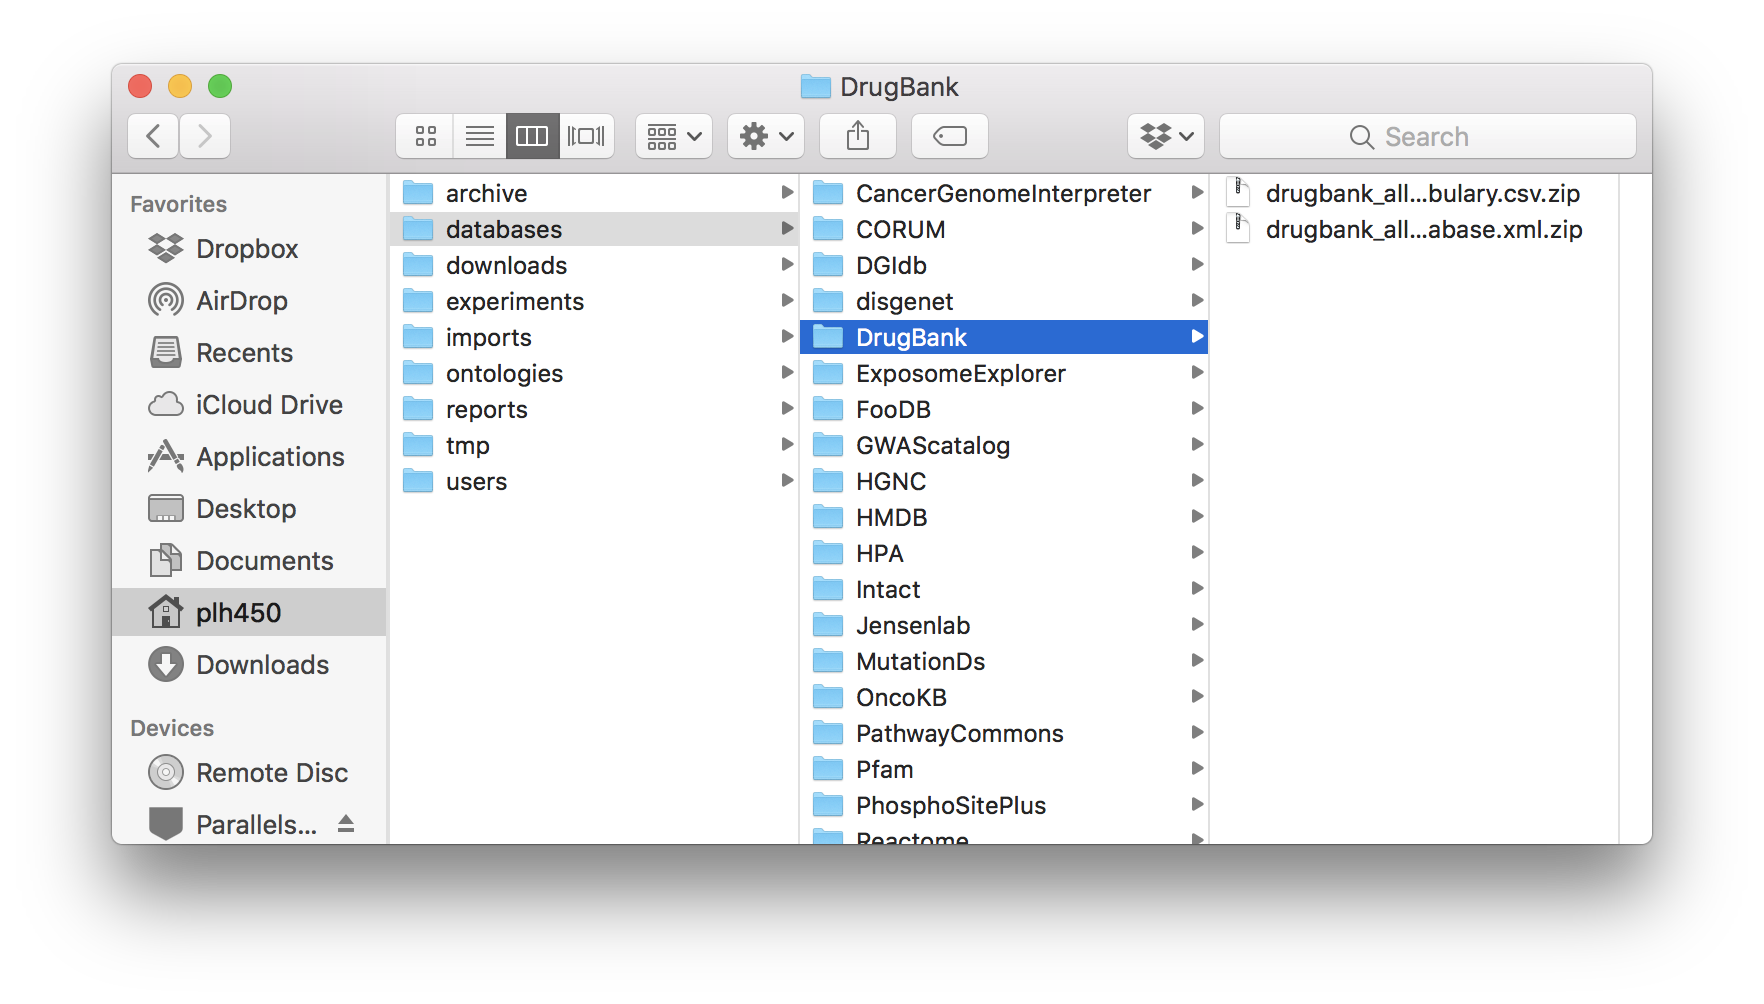
DrugBank database folder.
PhosphoSitePlus: Acetylation_site_dataset.gz, Disease-associated_sites.gz, Kinase_Substrate_Dataset.gz, Methylation_site_dataset.gz, O-GalNAc_site_dataset.gz, O-GlcNAc_site_dataset.gz, Phosphorylation_site_dataset.gz, Regulatory_sites.gz, Sumoylation_site_dataset.gz and Ubiquitination_site_dataset.gz.
DrugBank: All drugs (under COMPLETE DATABASE) and DrugBank Vocabulary (under OPEN DATA).
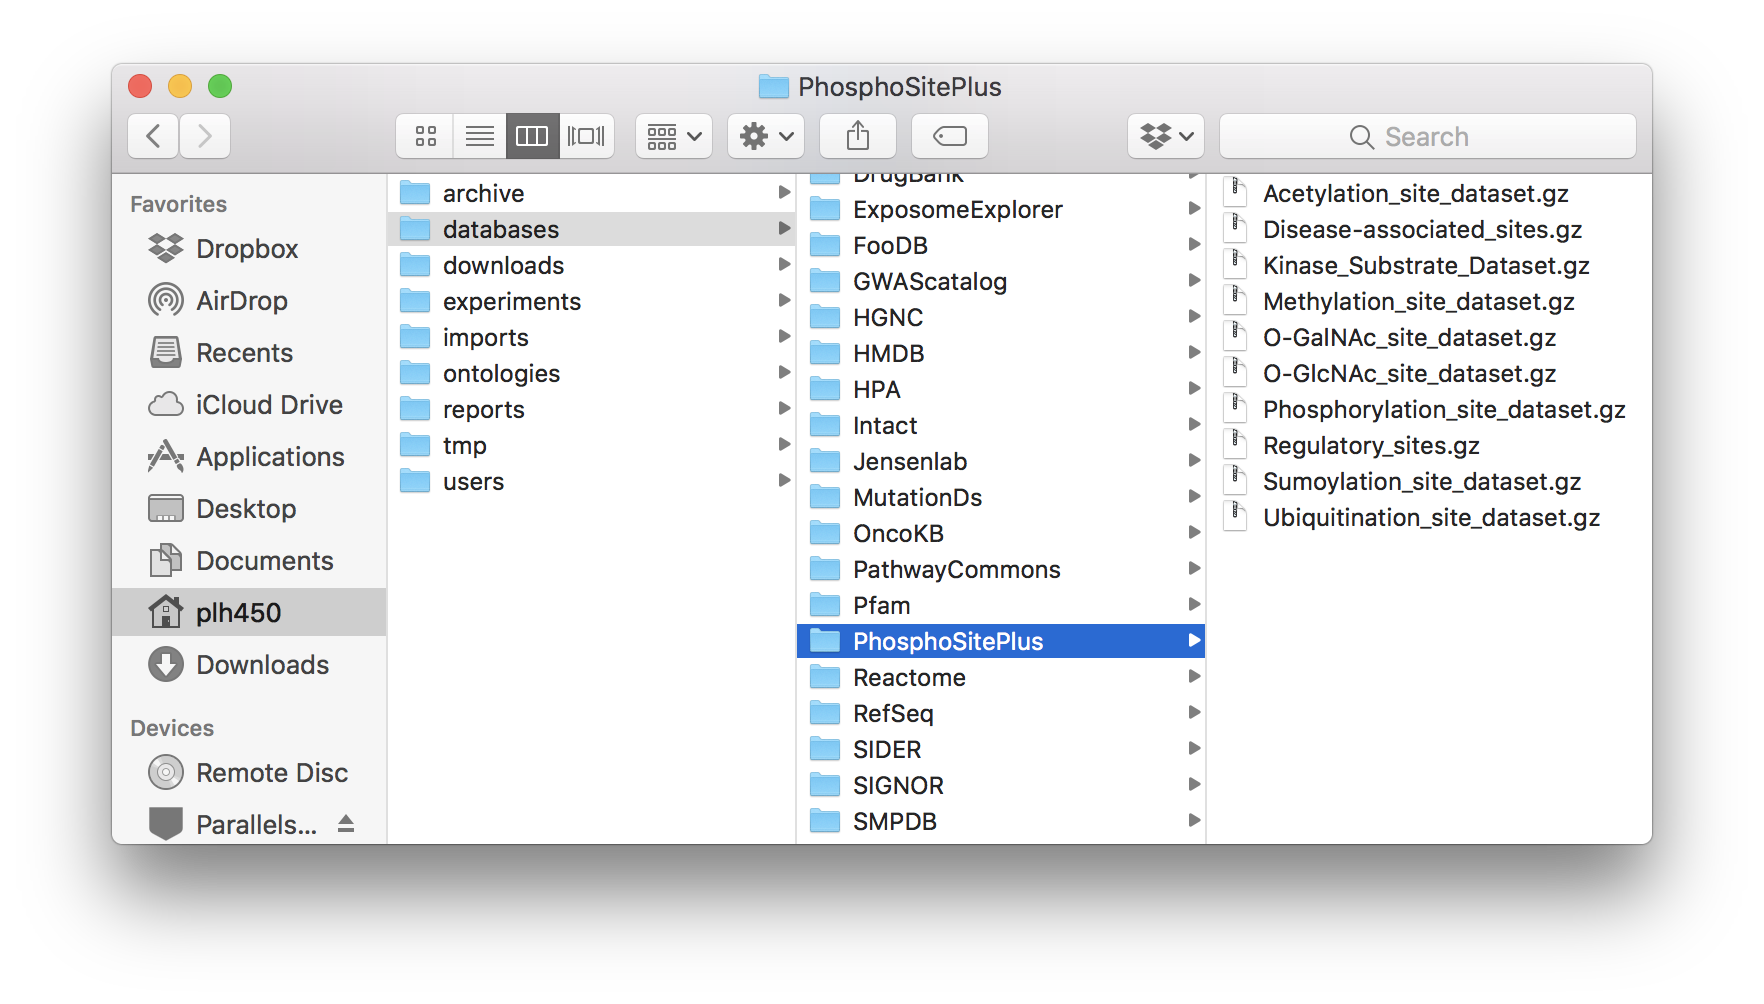
PhosphoSitePlus database folder.
SNOMED-CT: Download RF2 Files Now!.
After download, move the files to their respective folders:
PhosphoSitePlus:
CKG/data/databases/PhosphoSitePlusDrugBank:
CKG/data/databases/DrugBankSNOMED-CT:
CKG/data/ontologies/SNOMED-CT
In the case of SNOMED-CT, unzip the downloaded file and copy all the subfolders and files to the SNOMED-CT folder.
Warning
These three databases require login and authentication. To sign up go to PSP Sign up, DrugBank Sign up and SNOMED-CT Sign up. In the case of SNOMED-CT, the UMLS license can take several business days.
Note
If the respective database folder is not created, please do it manually.
The last step is to build the database, which can be done using the builder.py module or a dump file.
From the provided dump file
A dump file of the database is also made available in this link and alternatively, you can use it to load the graph database contained in it. To do so, download both files (ckg_080520.dump and data.tar.gz).
The .dump file will be used to load the Neo4j graph database:
Create
backupsandgraph.dbfolders:
$ cd /path/to/neo4jDatabases/database-identifier/installation-x.x.x/
$ mkdir backups
$ mkdir backups/graph.db
$ cp 2019-11-04.dump backups/graph.db/.
After copying the dump file to backups/graph.db/, make sure the graph database is shutdown and run:
$ bin/neo4j-admin load --from=backups/graph.db/ckg_080520.dump --database=graph.db --force
In some systems you might have to run this as root:
$ sudo bin/neo4j-admin load --from=backups/graph.db/ckg_080520.dump --database=graph.db --force
$ sudo chown -R username data/databases/graph.db/
Warning
Make sure the dump file naming in the command above, matches the one provided to you.
Once you are done, start the database and you will have a functional graph database.
Be aware the database contained in the dump file does NOT include the licensed databases (PhosphoSitePlus, DrugBank and SNOMED-CT).
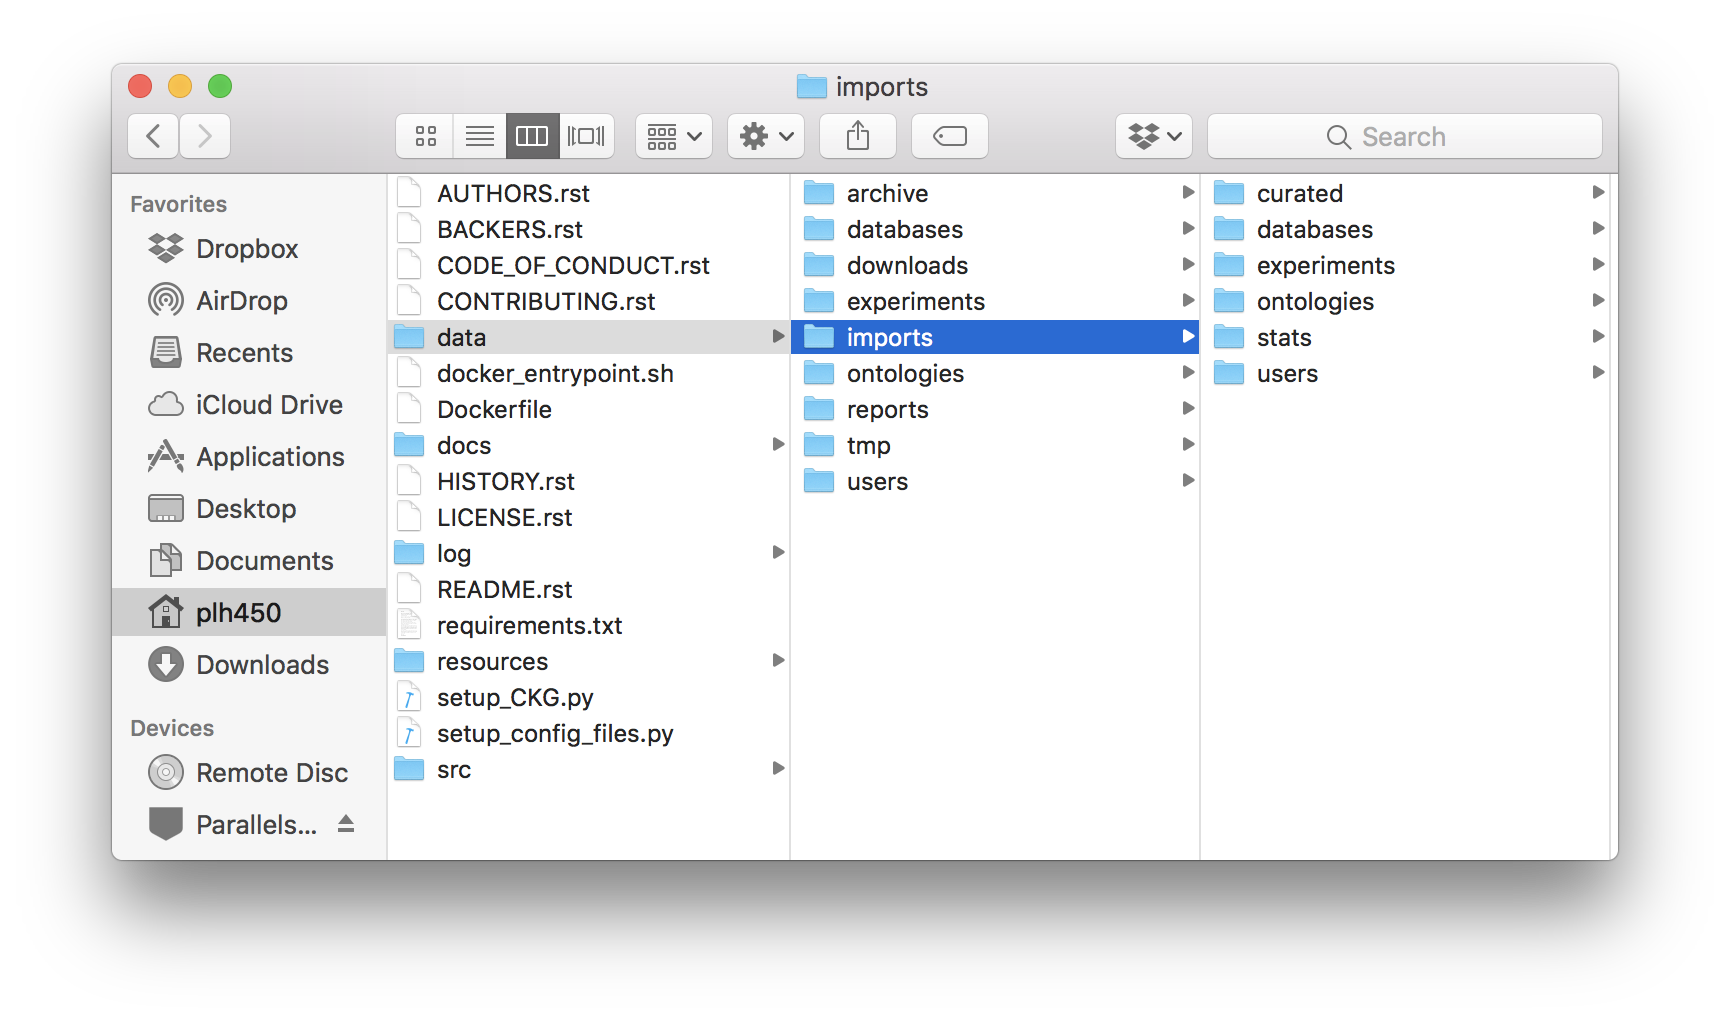
Final CKG/data folder architecture.
To add the missing ontology and databases, as well as their dependencies (relationships to other nodes), please manually download the files as explained in Build Neo4j graph database, unzip the downloaded file data.tar.gz and place its contents in CKG/data/. The folder data should look like the figure depicted.
Once this is done, run the following commands:
$ cd CKG/src/graphdb_builder/builder
$ python builder.py -b minimal -u username
Note
Remember of replace the username in each command, with your own neo4j username.
From builder.py
To build the graph database, run builder.py:
$ cd src/graphdb_builder/builder
$ python builder.py -b full -u neo4j
Warning
Before running builder.py, please make sure your Neo4j graph is running. The builder will fail otherwise.
This action will take approximately 6 hours but depending on a multitude of factors, it can take up to 10 hours.
More on the dump file
Another great use for the dump file, is to generate backups of the database (e.g. different versions of the imported biomedical databases). To generate a dump file of a specific Neo4j database, simply run:
$ cd /path/to/neo4jDatabases/database-identifier/installation-x.x.x/
$ bin/neo4j-admin dump --database=neo4j --to=backups/graph.db/name_of_the_file.dump
Warning
Remember to replace name_of_the_file with the name of the dump file you want to create.